Principle 1: Observe and interact
The time had come to focus on the cellar and try to address the final issues surrounding water infiltration. There have been a number of issues that I had encounted earlier:
- Water was running under the house during minor flood events and finding its way into the cool cupboard pipe, which runs into the cellar. This was addressed by building up earthern banks around the low points around the edges of the building.
- Water was running into the cellar during minor flood events via the hole that was left for the outlet for the sump pump and rainwater pressure pump, which is located inside. Earth was built up around the edge of the cellar to reduce this.
- Water was falling into the stairwell when it rained, which flowed into the cellar. A cover was built that addressed this.
- Water was weeping through gaps in the mortar when the surrounding earth become sodden. Channels were dug around the cellar to redirect runoff, which reduced this, but did not solve the problem.
Filling in the gaps in the mortar was a job that I finally got around to doing. It was a fairly big one, so was put off for a long time - while I waited for the ground to dry out. I figured that if I filled any obvious gaps then water infiltration would slow down.
This was done by mixing up a 9:3:2 mortar mix (sand : lime : cement) which was pushed into gaps with a putty knife. A wet sponge was used to wipe away excess and ensure that the gaps were filled.
I had thought about painting the brickwork to further prevent seepage with either a lime wash, polyurethane paint (left over from polishing the slab floor), or using a product called
Silasec made by Bondall. I decided not to attempt any of this in the end as I felt that, while one of these approaches may work for a period of time, eventually the cellar would leak again as water pressure would push against the treatment. These treatments would be more effective if painted on before the earth was filled in around the exterior of the brickwork. I have succumbed to the fact that 'nature abhors a void' and as a result will pump water out when necessary.
Since the work was done there have been some heavy rains and water still gets into the cellar, but it is no where near the problem it once was.
 |
| Filling gaps in the stairs with mortar |
 |
| Mortar gaps in the walls of the stairwell before being filled in |
 |
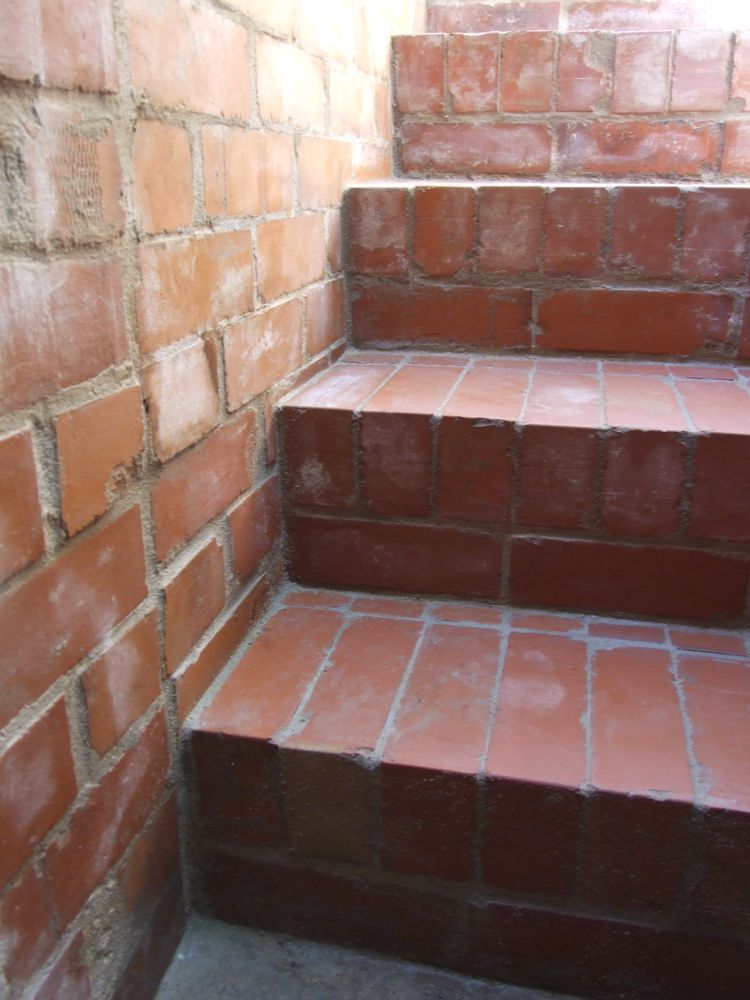
| The finished cellar stairwell |
 |
| Filling gaps inside the cellar |
 |
| The finished cellar wall |
 |
| The cellar is made using reclaimed brick with mortar and concrete, with an internal circumference of 2.2m and 2.1m of headroom. It sits 1.5m below ground level, with a 160mm thick concrete roof, forming the base for a 8,000lt water tank. The tank is our back up water supply that sits 800mm above ground level, allowing for gravity feed. There is a 400mm diameter pipe that leads from the cellar up to the kitchen cool cupboard. Air will be drawn through the cellar, reducing the effects of ethylene off-gassing which can spoil food. |
Principle 7: Design from patterns to details
Once the cellar structure was complete I focused on the storage system. It was difficult getting my head around building a system within a small circular space. I was keen to use what material that I had available, which included timbers left over from the house construction and crates that once contained flowers that my mate Brian picked up for $1.50 each. I figured that these could make great drawers.
I laid out the crates in the cellar to get an idea of how they might fit into the space. Then I built a unit that could hold six crates, which was the maximum height I could fit. Moving the unit into the cellar I confirmed that two would fit nicely against the end wall, deciding that shorter ones with benches on either side would make the space more usable.
Once all of the frames were set in place I joined them together, fitting triangular shelves between them which braced the entire unit. I added some smaller shelves above the benches and painted the lot with linseed oil to protect the timber against moisture.
 |
| The frame of the six drawer unit under construction in my tiny shed |
 |
| The six drawer frames against the back wall with shorter bench frames either side. Cement sheet off-cuts were used to choc-up the legs on the sloping floor. |
 |
| Gaps between frames filled in with triangular shelving, these ones can only be accessed when the crate drawers are removed |
 |
| Drawers in place. 16 can fit in all, although only 14 used. The benches are handy to put crates onto when sorting through produce. Some crates currently used for storing cleaned preserving jars and bottles. |


Comments