Insulating and lining
Principle 7: Design from patterns to details
One of the comments that I've heard from owner builders in the past was not to hold back on insulation. You only get one real good chance at it. I took this advice, and asked for the biggest insulation that I could to fit into the wall cavities - R2.0. I also decided to insulated all interior walls, as well as the exterior ones. The reason for this is because I want to be able to close off parts of the house that are not in use, and only heat parts that are. Also, I value my privacy. I think that it's important to insulate from noise, both outside and inside.
At around A$50 for a pack of 12 polyester batts (580mm x 1170mm), it's not a huge cost - but it does take time to fit properly. They were purchased locally and manufactured in Australia by Auspoly, mainly from recycled plastic bottles and are also recyclable (from what I understand), but do require a lot of energy in their manufacture. Getting insulation batts to fit snugly is important if it is to be effective. If insulation is compressed or if there are gaps, then it wont work as well as it should. I read once that 5% gaps reduces efficiency by 50% - whether that right or not I'm not sure, but I gathered that it's pretty important to get it right. The stud wall framing was built with standard 600mm / 1200mm spacings, so most batts fitted in nicely. Some were nailed into place if they sagged. There were also some odd shaped holes. Each of these spaces was measured up and drawn onto a batt using a texta. The batts were cut using a very sharp pair of scisors, I even removed sections where timber would have compressed them. You can do this when it's your an owner builder.


Once the walls were insulated I began fitting the 9mm (3 ply) structural plywood panels. Using structural ply adds strength to the walls, effectively turning them into giant box beams. The 9mm ply is strong enough to withstand some heavy pounding, unlike plaster, and is pretty easy to work with without professional help. Each sheet is 2400mm x 1200mm, and the majority of the lining required little cutting - but the devil is in the detail. The sheets where purchased from Melboure Wood Panels in Thomastown (northern Melbourne) for around A$30 per sheet. They are FSC stamped and sourced from New Zealand.
The curved ceiling added some challenges, but nothing too difficult. Holes needed to be cut where power points, light switches and lights are to be fitted. I also installed speaker wire into the top corners of three rooms, and needed to allow for that. It was very important to get nice straight cuts, so that the ply sheets would butt up neatly with one another. A long straight edge was clamped onto the sheets which acted as a guide for the circular sawing. I sanded the edges where they butted, making a feature of the joins, rather than trying to hide them (which is extremely difficult).


One of the comments that I've heard from owner builders in the past was not to hold back on insulation. You only get one real good chance at it. I took this advice, and asked for the biggest insulation that I could to fit into the wall cavities - R2.0. I also decided to insulated all interior walls, as well as the exterior ones. The reason for this is because I want to be able to close off parts of the house that are not in use, and only heat parts that are. Also, I value my privacy. I think that it's important to insulate from noise, both outside and inside.
At around A$50 for a pack of 12 polyester batts (580mm x 1170mm), it's not a huge cost - but it does take time to fit properly. They were purchased locally and manufactured in Australia by Auspoly, mainly from recycled plastic bottles and are also recyclable (from what I understand), but do require a lot of energy in their manufacture. Getting insulation batts to fit snugly is important if it is to be effective. If insulation is compressed or if there are gaps, then it wont work as well as it should. I read once that 5% gaps reduces efficiency by 50% - whether that right or not I'm not sure, but I gathered that it's pretty important to get it right. The stud wall framing was built with standard 600mm / 1200mm spacings, so most batts fitted in nicely. Some were nailed into place if they sagged. There were also some odd shaped holes. Each of these spaces was measured up and drawn onto a batt using a texta. The batts were cut using a very sharp pair of scisors, I even removed sections where timber would have compressed them. You can do this when it's your an owner builder.
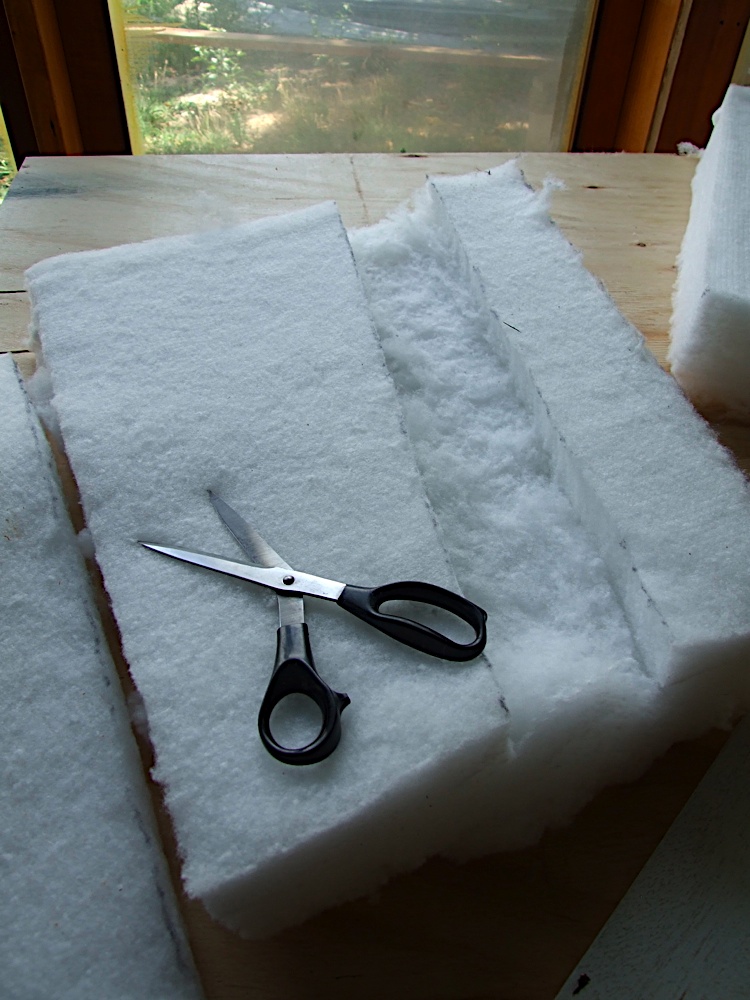
Cutting insulation with scisors, to ensure a snug fit
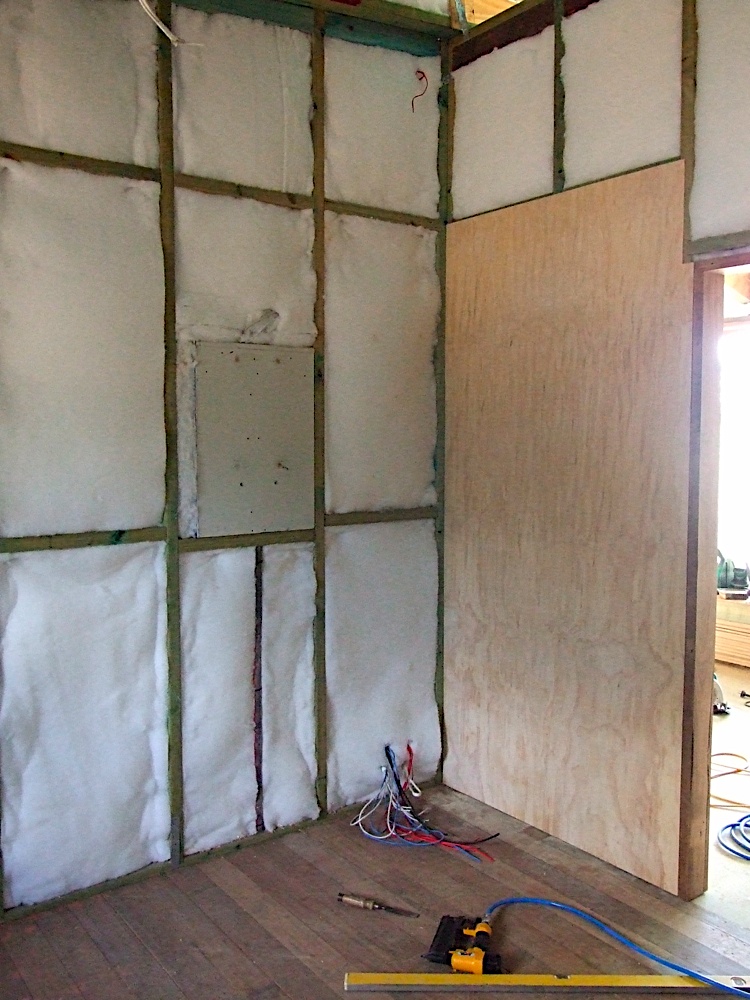
Fully insulated walls with R2.0 poly batts. 9mm plywood panels installed using a compressed air brad nail gun.
Once the walls were insulated I began fitting the 9mm (3 ply) structural plywood panels. Using structural ply adds strength to the walls, effectively turning them into giant box beams. The 9mm ply is strong enough to withstand some heavy pounding, unlike plaster, and is pretty easy to work with without professional help. Each sheet is 2400mm x 1200mm, and the majority of the lining required little cutting - but the devil is in the detail. The sheets where purchased from Melboure Wood Panels in Thomastown (northern Melbourne) for around A$30 per sheet. They are FSC stamped and sourced from New Zealand.
The curved ceiling added some challenges, but nothing too difficult. Holes needed to be cut where power points, light switches and lights are to be fitted. I also installed speaker wire into the top corners of three rooms, and needed to allow for that. It was very important to get nice straight cuts, so that the ply sheets would butt up neatly with one another. A long straight edge was clamped onto the sheets which acted as a guide for the circular sawing. I sanded the edges where they butted, making a feature of the joins, rather than trying to hide them (which is extremely difficult).
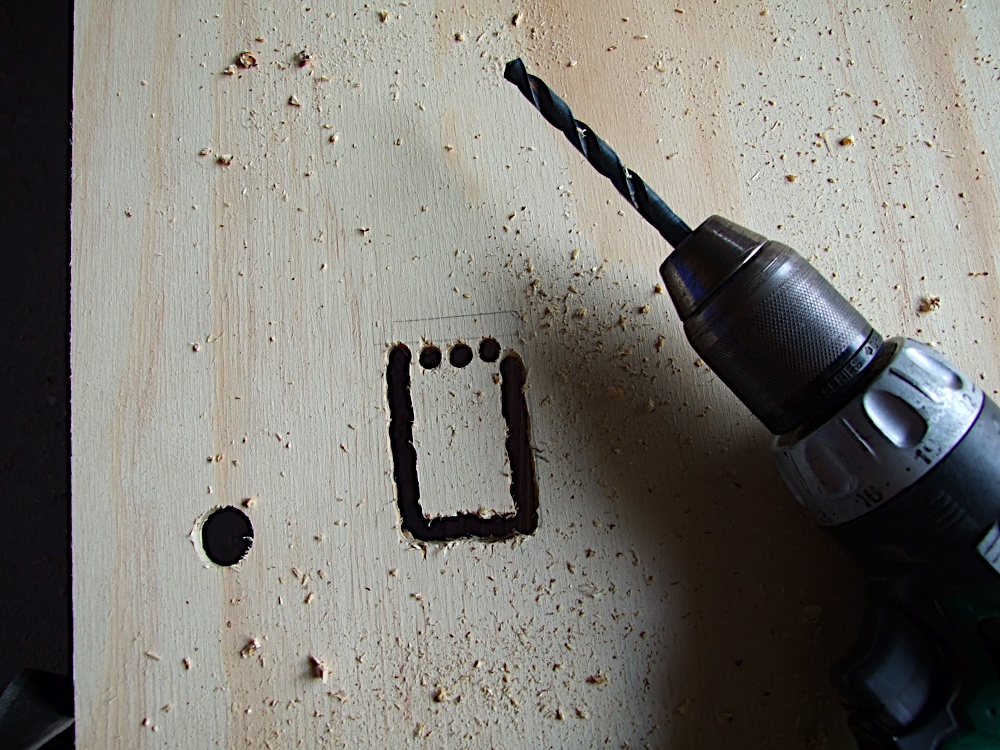
Using a drill to create a hole in the plywood panels for electircal connections

Cutting plywood panels using circular saw and metal straight edge to ensure that they fit together neatly

Edges sanded to make a feature of the join, rather than try to hide them

Lining with plywood in bedroom one
As walls and floors are never square - especially when using recycled material, uneven gaps are found around the corners. Trim will be used to fill these gaps, as well as around the doors and windows. A picture rail will be fitted at 2.4m, where the top of the sheet joins the top panel. I'm happy with the results and are thinking about retaining the effect of the grain rather than using an opaque paint to cover it up.


Comments