Reusing weatherboards
Principle 6: Produce no waste
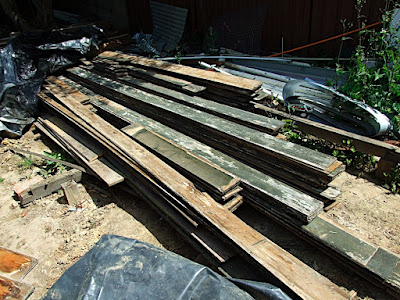
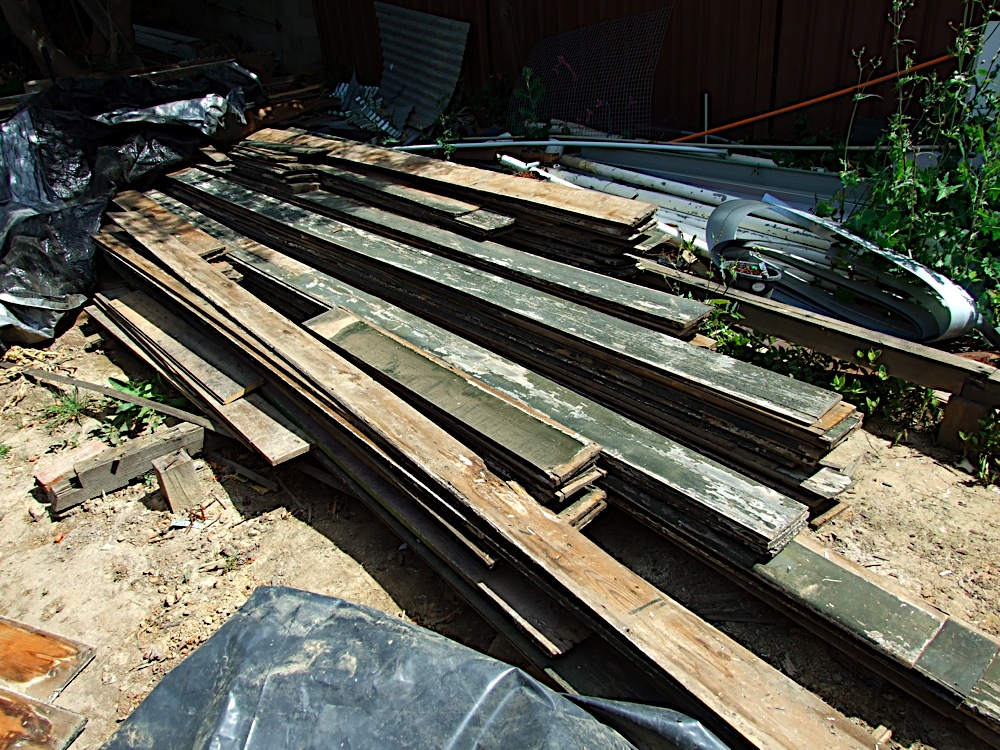
One of the things that I wanted to demonstrate in this project was that it is worthwhile reusing materials. By carefully deconstructing the original house I was left with quite a large stack of weatherboards. The question was, what was the best way to make use of them? One idea that I considered was to line the ceiling with them in the bedrooms.
I ended up deciding on using them for the long wall that runs the entire length of the house down the hallway. I had to do some calculations to make sure that I had enough timber to do the job. The boards would need to be sanded and trimmed if they were to look any good. I would trim about 15mm off the base of each board, leaving me with a 140mm coverage after they are overlapped. This would mean that the bull nosed (rounded) and angle nosed (flat) boards would look pretty much the same. I culculated that I would have enough for the hallway, and some extra for another area.
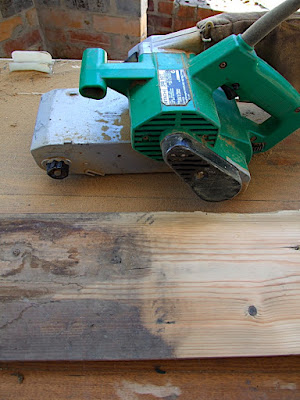
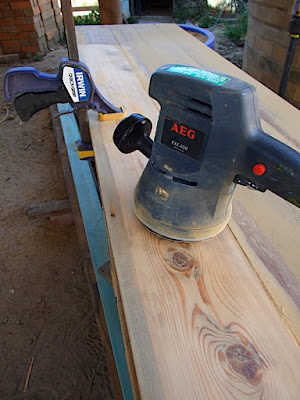
Removing the paint from would be a huge job, so I decided to flip them over and use the underside. It was suggested that I just give them a light sand to clean them up before fitting them. This would have been appropriate if I was to paint them, but when I discovered what was underneath the dirt I decided to go the whole hog and expose the timber. The boards were sanded initially using a belt sander with medium grade paper (28 hours work). After that the edge was trimmed off (7 hours). Then they were cut, given a finishing sand using an orbital sander with a finer grade of paper and fit into place (40 hours).


One of the things that I wanted to demonstrate in this project was that it is worthwhile reusing materials. By carefully deconstructing the original house I was left with quite a large stack of weatherboards. The question was, what was the best way to make use of them? One idea that I considered was to line the ceiling with them in the bedrooms.
Mixed pine weatherboards, some bull nosed, some angle nosed and some flat boards
Removing the paint from would be a huge job, so I decided to flip them over and use the underside. It was suggested that I just give them a light sand to clean them up before fitting them. This would have been appropriate if I was to paint them, but when I discovered what was underneath the dirt I decided to go the whole hog and expose the timber. The boards were sanded initially using a belt sander with medium grade paper (28 hours work). After that the edge was trimmed off (7 hours). Then they were cut, given a finishing sand using an orbital sander with a finer grade of paper and fit into place (40 hours).

Weatherboards being sanded using a belt sander

Trimming weatherboards using a powersaw and guide

Finishing sand of weatherboards using an orbital sander
Door frames for the bedrooms (made from reclaimed rafters) were installed before I could start fitting the weatherboards, giving something to butt up to. Insulation was installed on the west wall before the boards could be fitted. I got the thickest batts I could, R2.0 polyester batts for the job, which were available locally. They are made mostly from recycled bottles (85% I think), long lasting and are recyclable. They were pretty easy to work with, I used sharp scissors to cut them to fit, and nailed them at the top so that they wouldn't slip down over time. Electric cables sit behind the batts, just in case someone decides to drill through the wall...
The boards were up to 4.5m in length, fitting them by myself was pretty tricky. I used a long stick with marks on it at 140mm spacings to ensure that they were all in line and parallel. A couple of quick release clamps helped hold most of the boards in place. On the wall where I couldn't use the clamps I lightly nailed into the board about half way in before holding it in place and fitting it. A bit of a balancing act when you are up on a scafold.

The doorframe was fitted first, giving the boards something to butt up to

Installation of R2.0 polyester insulation batts before fitting weatherboards

Fitting weatherboards in the living room

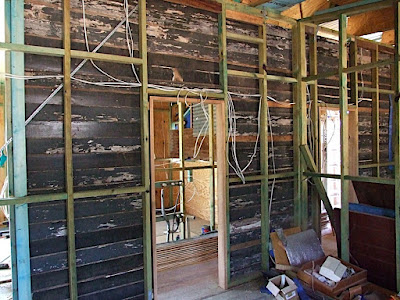
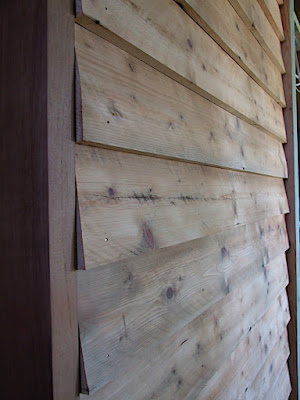
Flipside of weatherboards
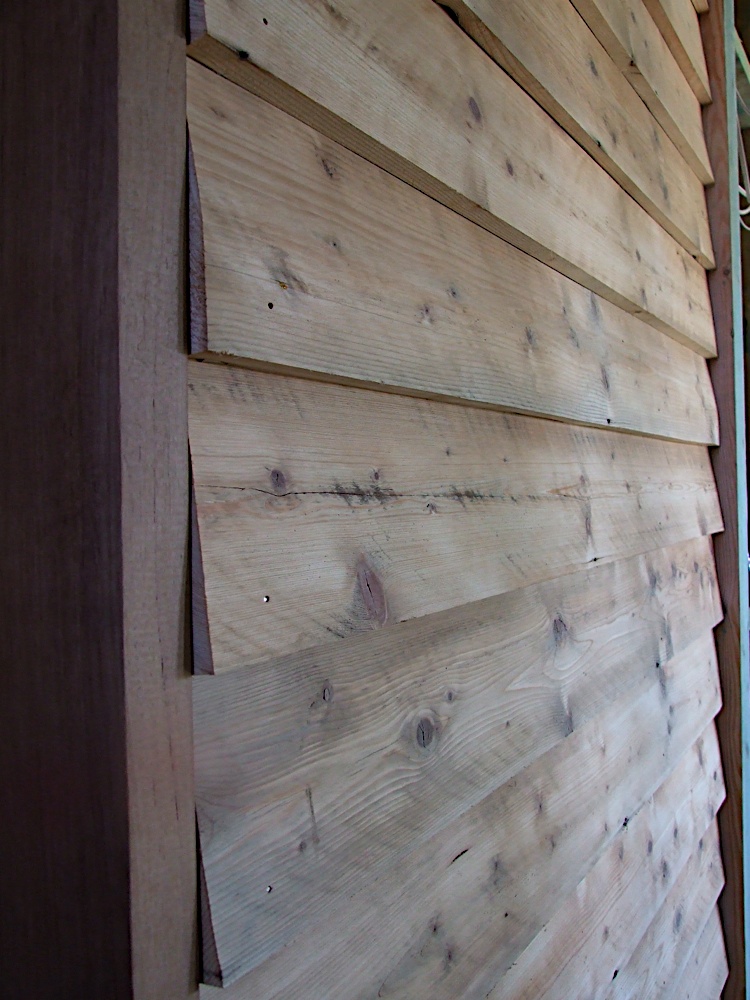
Fitted weatherboard detail

Finished hallway wall
While the hours involved in completing the wall are significantly more than with new materials, the result is fantastic. There is a story to tell with it as well, the old becoming the new and much lower embodied energy. I would not recommend do this if you are paying someone else though, as it would be very expensive, but a good DIY job.


Comments
Are you going to stain or just oil the boards?
It's more oiling the wood so it doesn't dry out - rather than coating it with a vanish to seal it. I also think this helps the timber to breathe better.
That's just my personal opinion though, because I love the smell, touch and look of natural timber.
There are probably better oils on the market than linseed, but if I had a wood feature wall, I'd be looking into oils rather than a sealing vanish.
Either way you go though, I reckon it's going to look pretty flash. :)